Publishing Your Image
After you created your interactive image, it's time to publish it on your website. Please see the instructions below, corresponding to the version of Image Map Pro that you are using.
WordPress Version
There are a couple of ways to publish your image map:
- Gutenberg (WordPress Editor) - Image Map Pro integrates seamlessly with the new Gutenberg post editor. You can insert an "Image Map Pro" element and select your image from the dropdown menu on the element itself.
- Shortcode - You can insert the image into a WordPress page or a post using a shortcode, which you can copy or change from the Editor: open the Settings from the left, and at the top you will see a shortcode field there. For example, if you enter my-image-map as a name of your image map or directly as a shortcode, you can insert the image map with [my-image-map] in plain text.
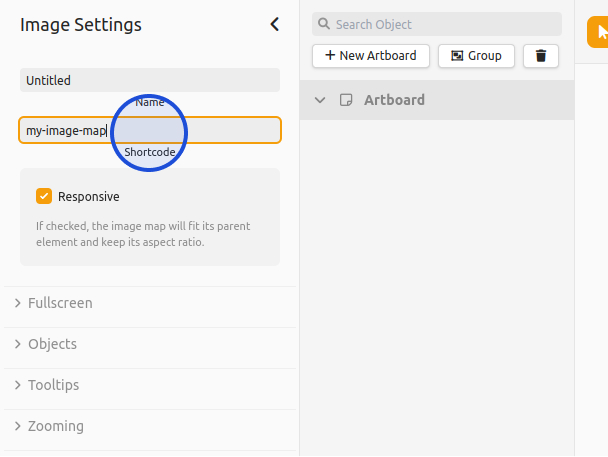
IMPORTANT: Please keep in mind that the shortcode must be entered without brackets and must not contain any spaces or special characters.
Standalone Version
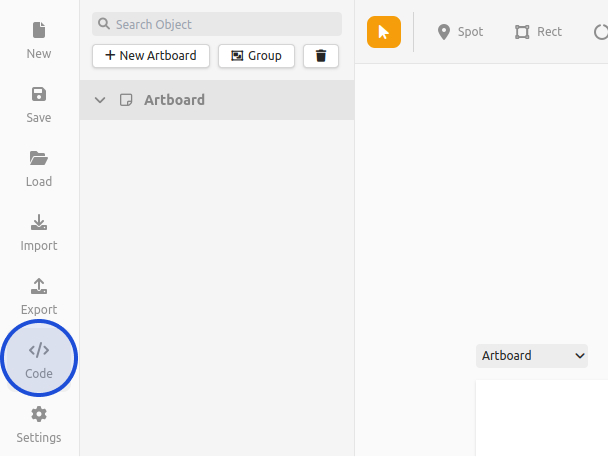
Inserting the finished image on your site is straightforward. From the Editor, press theCode button on the left:
A window will open, showing you the steps necessary to insert the interactive image on your site:
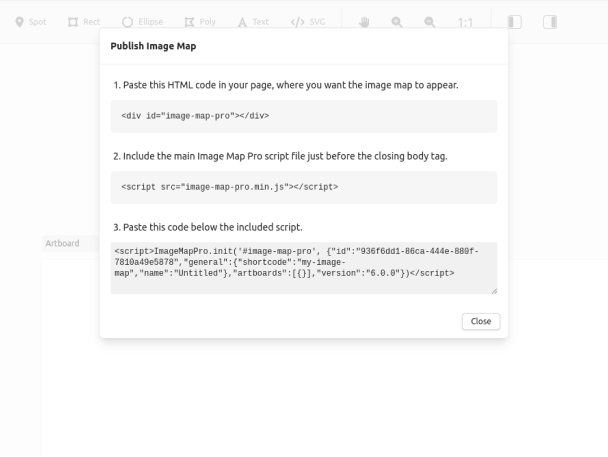
- Copy the HTML code and paste it on your site, where you want the image to appear. Keep in mind that by default the image will fit its parent element, while preserving the aspect ratio.
- Include the script file by adding a
<script>tag just before the closing body tag, pointing to image-map-pro.min.js. Please keep in mind that you need to host this file yourself. - Paste the launch code just below the script that we included in the previous step.