
Founder & Developer
Feb 8, 2023
How to add interactivity to an SVG image
With Image Map Pro you can easily add interactivity to any SVG file - a country, infographic, drawing or anything.
In this article we will create the following example:
In this example we will be using this image. Let's get started!
Creating a new project
Start by clicking New from the sidebar on the left. Enter a name for your new project, select Blank template and click Create.

Import the SVG file
First, download the image that we used in this example, or use your own.
Important note - we recommend cleaning up necessary objects and organizing objects into groups in order to make editing it in Image Map Pro easier.
Open it with a text editor and copy the SVG code. From the Image Map Pro editor click the SVG button and paste the code. Make sure Import as Multiple Objects is enabled and press Import:
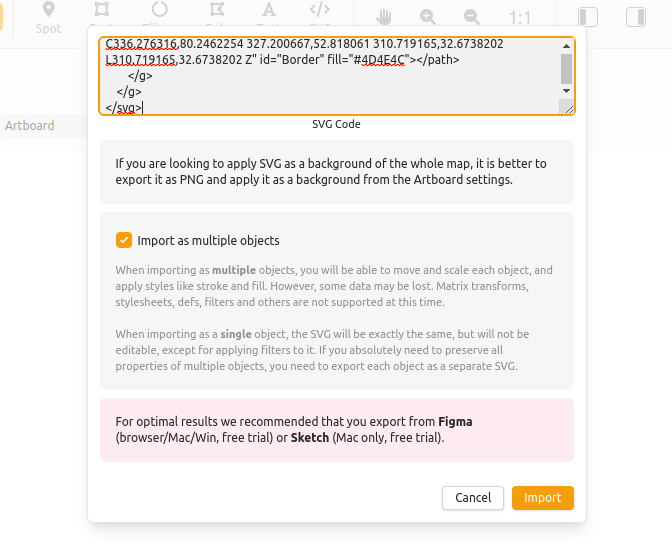
If you SVG fails to import, make sure it's exported from a modern application like Sketch or Illustrator. If everything fails, you can choose to export one object at a time as an SVG and when importing, disable "Import as Multiple Objects". This will import the file as-is, but will not give you control over the individual objects.
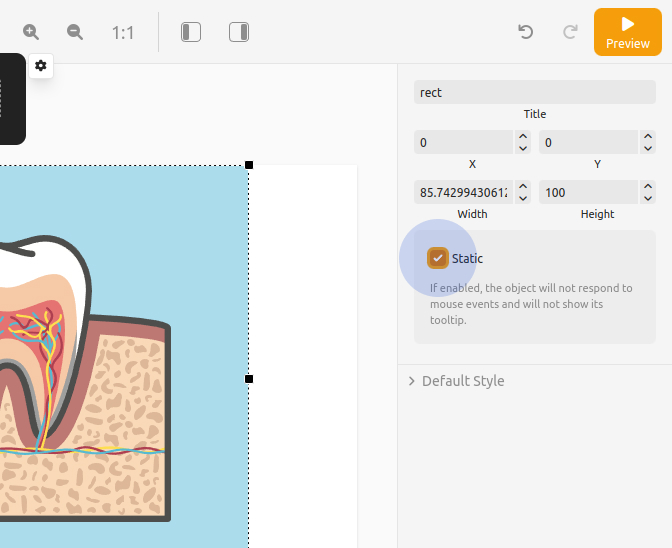
Disable objects that should not be interactive
In our example, the blue background is an object, but we don't want it to be interactive. Select it by clicking on it in the canvas, then from the object settings on the right, enable Static. This will make the object ignore any mouse events, which is exactly what we need:
Group objects and add mouseover effects
In an SVG file you will most likely have a group that contains many objects, but you want it to behave like a single object. In our example that is the "Bone" object. Find it in the object list on the left and from the object settings enable Single Object:
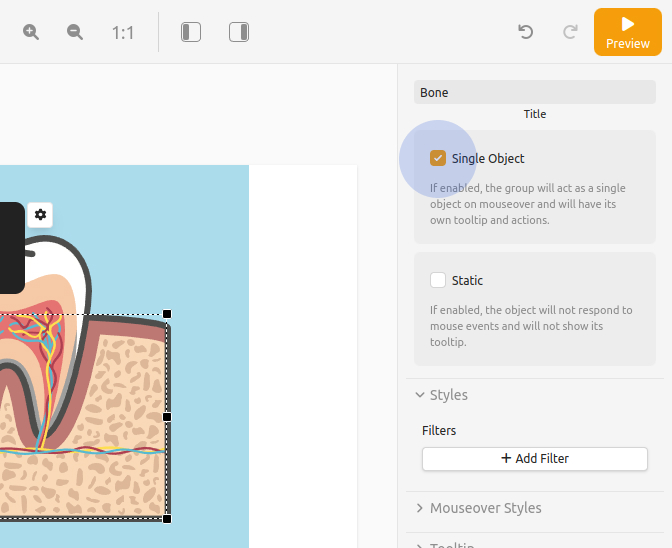
Any group that is a Single Object will merge its children and behave like one object when you mouseover it. To illustrate the point, let's add a mouseover effect to the bone.
Select the Bone group from the list and open the Mouseover Styles group on the right:

To make our life easier, click Display in Editor. Otherwise we would have to go into Preview mode and mouseover the object every time we make a change to the settings:
Groups and SVG objects can have CSS filters as effects. Click the Add Filter button and select Brightness. Set the value to 1.2. Feel free to experiment with other effects, and if you are not sure what value to enter - these are standard CSS filters.
When you are happy with the result, disable Display in Editor.
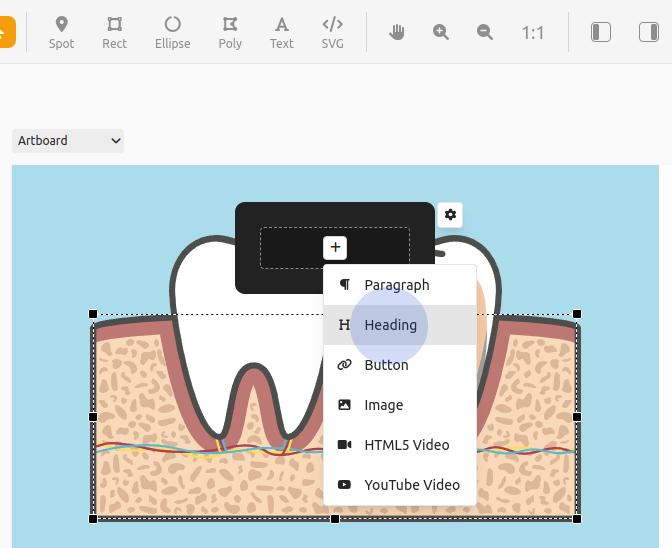
Add tooltips
Adding content to the tooltip is really simple. First, select an object and make sure that the tooltip is enabled from the Tooltip category in the object settings on the right:
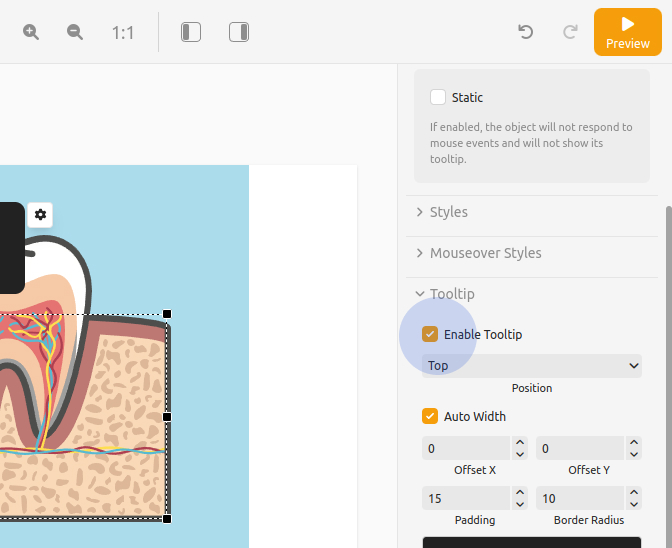
Important note - if you have a group that is marked as a Single Object, it will get its own tooltip. Tooltips from its children will not appear. If the group is not a Single Object, it cannot have a tooltip.
The tooltip will appear above the object in the canvas. Click the "+" button to add a heading and enter some text. Finally, let's change the background color and add some transparency for the tooltip clicking the Settings button of the tooltip:
Add functionality
If you have a complex map, it will be a good idea to add zooming and fullscreen functionality. Open the map settings from the Settings button on the left, expand the Fullscreen and Zooming categories and make sure they are enabled.
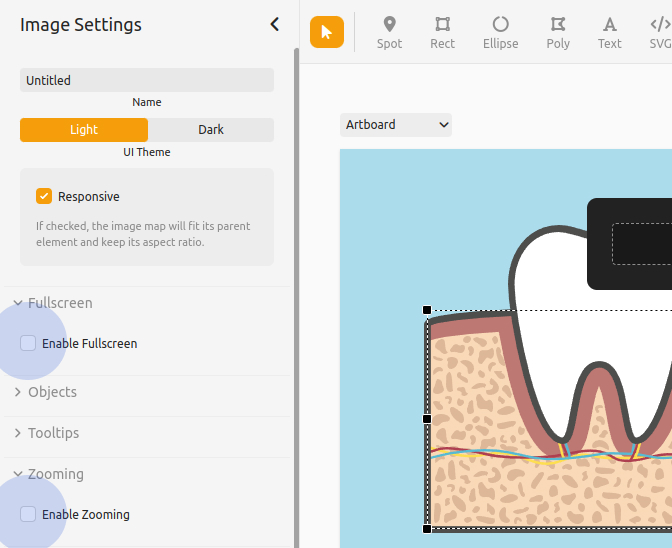
When you enable zooming, the Navigator window is enabled by default. However it only displays images that are set as a background of the artboard. It doesn't show objects, so it will be better if we disable it from the Zooming settings.
Conclusion
That's it! Click Preview and see the end result. We added interactivity to an SVG file and it took us only minutes.
If you need help using Image Map Pro or to report a bug, please contact us. We always try to respond within 48 hours.